
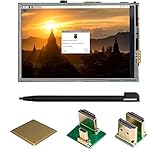
for Raspberry Pi 3 b+ Display Case, 3.5 inch TFT LCD Touch Screen Monitor with Driver Instruction for Raspberry pi 3 Model b+
Product Description
for Raspberry Pi 3 b+ Display Case, 3.5 inch TFT LCD Touch Screen Monitor with Driver Instruction for Raspberry pi 3 Model b+
<b>The RASPBERRY Pi Not Included!</b><br><br>Connect to the raspberry pi directly via spi. It has SPI interface and connected to Raspberry PI using GPIO pins <br><br>If you are seeking for a product with simplified Human-Computer Interaction interface, the basic statistics collection , as a secondary monitor and so on. No matter what you do, without the mouse and keyboard is nothing difficult(work with powerbank), simultaneously, carry and DIY are also great. <br><br>After receiving the screen, plug it in and power it up by GPIO Pin, it will become a white screen. So, you must install the driver before using. The divers is enclosed in the instruction manual.<br>If you are <b>not familiar</b> with installing driver for screen, please try our <b>pre-installation driver image system: </b><br><br><b> Raspbian System </b>(Support Raspberry Pi 3 B+, Pi 3 & Pi 2 version): <br>https://drive.google.com/open?id=1i4qDCDJC5n5g3JtG3P3TdA0EdkthgSRv <br> <br> <b>Kali System </b>(Support Raspberry Pi 3 B+, Pi 3 & Pi 2 version): <br> https://drive.google.com/file/d/1OXQV5TQx071odq6Gzc9q0KqF69qQ6IQL/view?usp=sharing <br> <br> <b>Ubuntu System</b> (Support Raspberry Pi 3 & Pi 2 version, NOT support Pi 3 B+):<br>https://drive.google.com/open?id=1BwgkmWOXr3_SouCv8NMaV3-eFdM4tBiN <br> <br>Specification:<br>Specifically for Raspberry Pi, with mini screen (only 3.5 inch) , 320 x 480 resolution. <br>The case is very easy to assemble for beginner. The corner screws in the case support the balance between the case and screen.<br>According to the instruction and tutorial video, beginner can get started asap, expert can done it fast.<br><br>Some useful tool download: https://drive.google.com/open?id=1mXqeTdW0eKFeFH7q3ANYdbfgvLTTOnmU <br><br>Shipment :<br>Before shipping the product, inspector and testing are necessary.<br><br><b>Package:</b><br>3.5 scree with touch pen x 1<br>Heatsink x 3<br>5 Layers Case x 1<br>
Technical Specifications
You might also like

Element14 Raspberry Pi 3 B+ Motherboard

RS Components Raspberry Pi 3 B+ Motherboard
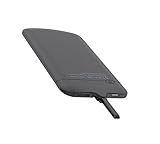
Battery Pack for Raspberry Pi 3 B+, 4000mAh, Suction
UCTRONICS 3.5 Inch HDMI TFT LCD Display with Touch Screen, Touch Pen, 3 Heat Sinks for Raspberry Pi 3 Model B+, 3 Mode B,Pi 2 Model B, Pi B+

Miuzei Raspberry Pi 3B+ Battery Pack Expansion Board, UPS Battery Pack with Acrylic Case for Raspberry Pi 3B+, 3B, 2B
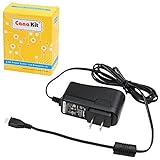
CanaKit 5V 2.5A Raspberry Pi 3 B+ Power Supply / Adapter (UL Listed)

Raspberry Pi Camera Module V2-8 Megapixel,1080p

Raspberry Pi 7" Touch Screen Display
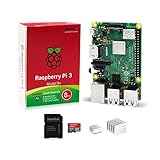
LoveRPi Raspberry Pi 3 B+ 8GB Quick Start Kit with Raspbian Desktop

NorthPada Raspberry Pi 3 Model B B+ A+ Plus Power Supply Charger AC Adapter 5V 3A PSU Micro USB 5 Feet with Power On/Off Switch (1 X Power Supply)