
Embroidery Name Patches,2 Pieces Custom Personalized Military Tapes Tag Customized Logo ID for Multiple Clothing Bags Vest Jackets Work Shirts (Normal)
Product Description
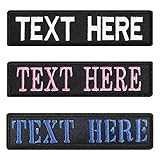
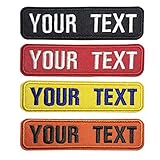
Embroidery Name Patches,2 Pieces Custom Personalized Military Tapes Tag Customized Logo ID for Multiple Clothing Bags Vest Jackets Work Shirts (Normal)
- Patch Size: 3"x 1" , 4” x 1” , 5 "x 1.5" , 6" x 2"
- Hook Fastener -HOOK-LOOP, IRON ON, SEW ON
- For tactical backpack, jacket, work suit, helmets--For Name
- For dog vest and dog harness -- Do not pet, Service dog, Best Friend, In Training
- ANY OTHER SIZE CAN BE DONE AS YOUR REQUEST -- MESSAGE US
<b>1.Velcro. 2.Iron on. 3.Sew on.</b><br> <br><b>Your name... -- For travel bag, jacket, work suit, Helmets</b><br> <br><b>Do not pet, Service dog, Best Friend, In Training... -- For dog vest and dog harness</b><br> <br><b>How to Iron on Patches<br></b> <br>1. lay out your jacket, sash or backpack and decided where exactly you want the patch to be placed.<br> <br>2. Place the patch in the position you chose.<br> <br>3. Heat up an iron. Turn it to the hottest setting your fabric can tolerate. Make sure the "steam" option is turned off, and that your iron isn't full of water.<br> <br>4. Place a thin towel over the patch. Take care not to disturb the position of the patch. The towel will protect the patch itself and the surrounding fabric.<br> <br>5. Position the heated iron over the patch and press down. Hold the iron there for about 15 seconds. Apply as much pressure as you can by pressing down firmly.<br> <br>6. Remove the iron and allow the patch to be cool.<br> <br>7. For a completely secure patch, use a sewing machine or a needle and thread to secure the patch to the fabric. This greatly reduces the chances that the patch will fall off.<br> <br>8. Don't wash the article more than necessary. Iron-on patches are meant to be permanent, but they do become loosened over time. <br>
Technical Specifications
You might also like

Tactical US Flag with Tracker Paw Patriot Milltary Embroidered Applique Morale Hook & Loop Patch - White & Black
2 Pieces of The Custom Personalized Embroidered Name Patches Hook Fastener,Uniform,Work Shirt,Hat Morale Name Patch, Size is 4"X1"
Graceful life Custom Embroidery Name Patches,2 Pieces Personalized Military Number Tag Customized Logo ID for Multiple Clothing Bags Vest Jackets Work Shirts

TACVASEN Bundle 2 pieces-Tactical Police law enforcement Thin Blue Line United States Flag Patch

Tactical Patches of USA US American Flag, with Hook and Loop for Backpacks Caps Hats Jackets Pants, Military Army Uniform Emblems, Size 3x2 Inches

Customizable Text Patch - 2x3 Morale Patch - Multicam

OutdoorMaster Bungee Dog Leash, Improved Dog Safety & Comfort (Tan)

OneTigris Original Patch Tactical Morale Military Patch Mama Says I'm Special (Black)