
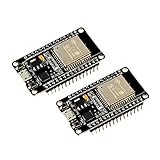
ESP8266 NodeMcu ESP8266 Module (4pcs),ESP-12E NodeMcu LUA CP2102 Internet WiFi Development Board Works with Arduino IDE/Micropython
Product Description
ESP8266 NodeMcu ESP8266 Module (4pcs),ESP-12E NodeMcu LUA CP2102 Internet WiFi Development Board Works with Arduino IDE/Micropython
- Why ESP8266:ESP8266 is a highly integrated chip designed for the needs of a new connected world.It offers a complete and self-contained Wi-Fi networking solution, allowing it to either host the application or to offload all Wi-Fi networking functions from another application processor.
- Feature: ESP8266 NodeMcu board has powerful on-board processing and storage capabilities, allows to be integrated with sensors and other specific applicated devices through its GPIOs.
- High quality & Guaranteed:60 days money back guarantee for any quality reasons,and 24-hour customer service.
<b>ESP8266 NodeMcu ESP8266 Module(4pcs),ESP-12E NodeMcu LUA CP2102 Internet WiFi Development Board Works with Arduino IDE/Micropython</b><br><b>Description:</b><br><b>Instruction & Steps of How to use:</b><br>1. Download the Arduino IDE, the latest version.<br>2. Install the IDE<br>3. Set up your Arduino IDE as: Go to File->Preferences and copy the URL below to get the ESP board manager extensions: http://arduino.esp8266.com/stable/package_esp8266com_index.json Placing the http:// before the URL lets the Arduino IDE use it...otherwise it gives you a protocol error.<br> 4. Go to Tools > Board > Board Manager> Type "esp8266" and download the Community esp8266 and install.<br> 5. Set up your chip as:<br> Tools -> Board -> NodeMCU 1.0 (ESP-12E Module)<br> Tools -> Flash Size -> 4M (3M SPIFFS)<br> Tools -> CPU Frequency -> 80 Mhz<br> Tools -> Upload Speed -> 921600<br> Tools-->Port--> (whatever it is)<br> 6. Download and run the 32 bit flasher exe at Github(Search for nodemcu/nodemcu-flasher/tree/master/ at Github) github.com/nodemcu/nodemcu-flasher/tree/master/Win32/Release Or download and run the 64 bit flasher exe at: github.com/nodemcu/nodemcu-flasher/tree/master/Win64/Release<br> 7. In Arduino IDE, look for the old fashioned Blink program. Load, compile and upload.<br> 8. Go to FILE> EXAMPLES> ESP8266> BLINK, it will start blinking.<br><br> <b>Note:</b>Please contact us if you need the driver or meet any issue when using. We provide 100% satisfication service for customers.<br><br> <b>Package Including:</b><br> 4 * ESP8266 ESP-12E NodeMcu Development Board
Technical Specifications
You might also like

ALITOVE 16.4ft WS2812B Individually Addressable RGB LED Strip Light 5m 150 Pixels Dream Color Programmable Digital LED Flexible Strip Waterproof IP65 Black PCB 5V DC
—
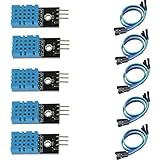
HiLetgo 5pcs DHT11 Temperature Humidity Sensor Module Digital Temperature Humidity Sensor 3.3V-5V Humidity Measure Range 20%-95% Temperature Measure Range 0-50℃ Celsius with Dupont Wires
—

IZOKEE D1 Mini NodeMcu Lua 4M Bytes WLAN WiFi Internet Development Board Base on ESP8266 ESP-12F for Arduino, 100% Compatible with WeMos D1 Mini (Pack of 5)
—

HiLetgo 2pcs DHT22/AM2302 Digital Temperature And Humidity Sensor Module Temperature Humidity Monitor Sensor Replace SHT11 SHT15 for Arduino Electronic Practice DIY
—

Elegoo EL-CP-004 120pcs Multicolored Dupont Wire 40pin Male to Female, 40pin Male to Male, 40pin Female to Female Breadboard Jumper Wires Ribbon Cables Kit for arduino
—

BINZET DC Converter Step Down Regulator 5V Regulated Power Supplies Transformer Converter (5V 3A 15W)
—

HiLetgo 10pcs 4 Channels IIC I2C Logic Level Converter Bi-Directional 3.3V-5V Shifter Module for Arduino
—
MELIFE 2 Pack ESP32 ESP-32S Development Board 2.4GHz Dual-Mode WiFi + Bluetooth Dual Cores Microcontroller Processor Integrated with ESP32s Antenna RF AMP Filter AP STA for Arduino IDE
—

Tanbaby 5V 60A DC Universal Regulated Switching Power Supply for CCTV, Radio, Computer Project Mode Converter
—

XCSOURCE 5PCS IIC I2C Logic Level Converter Bi-Directional Module 5V to 3.3V TE291
—